Using Git to implement a new feature without affecting the master branch
Git merge conflicts can be a nightmare for developers, especially in collaborative environments where multiple people are working on the same project. While merge conflicts typically arise when multiple people have write access to the same master branch, they can also occur in a solo developer’s workflow if they clone a repository in multiple places or sync their repositories across machines. So, how can we minimize these conflicts?
In my team’s experience, merge conflicts often arise when a new team member joins the project and directly pushes their changes to the master branch. To reduce these conflicts, we switched to a feature branch workflow, which provides a more organized and safer way to handle Git operations.
The Feature Branch Workflow
The feature branch workflow is based on the idea of using a central repository (the upstream repository) where the master branch always represents the official project history. Developers work on new features or bug fixes in separate feature branches before merging them back into the master branch.
Key Rules of the Feature Branch Workflow
- Feature branches are used for developing new features or enhancements.
- Developers create a disposable branch from their local clone of the repository for each feature or bug fix.
- The
masterbranch in the central repository remains clean and represents the stable project state. - Before pushing to the central repository, developers should rebase their feature branches onto the latest
masterbranch to avoid lagging behind the changes made by others. - Developers push their feature branches to the central repository and create a Merge Request (GitLab) or Pull Request (GitHub) to request a review and merge into the master branch.
Real-World Example: Using GitLab for Feature Branch Workflow
Here’s how Drew Blessing worked with the omnibus-gitlab repository to implement a new feature.
1. Forking the Repository
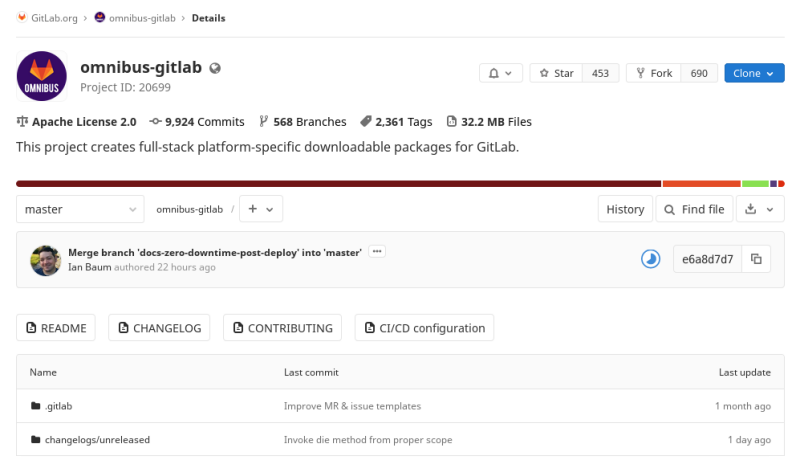
First, Drew forks the omnibus-gitlab repository (which we’ll call the upstream repository) into his own namespace on GitLab (called the origin repository). This creates a personal copy of the repository where he can freely make changes without affecting the upstream project.
Fork URL: https://gitlab.com/dblessing/omnibus-gitlab
2. Cloning the Fork Locally
Drew then clones his forked repository to his local machine to begin working on his feature.
git clone [email protected]:dblessing/omnibus-gitlab.git
cd omnibus-gitlab
git checkout -b dblessing_prom_saturation
The -b flag creates and checks out a new branch named dblessing_prom_saturation, where Drew will implement his feature.
3. Adding the Upstream Remote
To keep his local repository in sync with the upstream project, Drew adds the URL of the original repository as a remote called upstream.
git remote add upstream https://gitlab.com/gitlab-org/omnibus-gitlab.git
git fetch upstream
By doing this, Drew can fetch updates from the upstream repository and compare changes between upstream/master and his origin/dblessing_prom_saturation.
4. Implementing the Feature
Drew begins working on his feature, which involves adding new Prometheus “saturation rules” to a specific file.
git add files/gitlab-cookbooks/monitoring/templates/rules/gitlab.rules
git commit -m "Add saturation recording rules to Prometheus"
5. Rebasing the Feature Branch
Before pushing his changes to the remote repository, Drew needs to ensure his feature branch is up-to-date with the latest changes from upstream/master to avoid conflicts. This process is known as rebasing.
git checkout dblessing_prom_saturation
git fetch upstream
git rebase upstream/master
The git rebase upstream/master command re-applies Drew’s changes on top of the latest commits from upstream/master, ensuring his branch is up-to-date with the project’s main history.
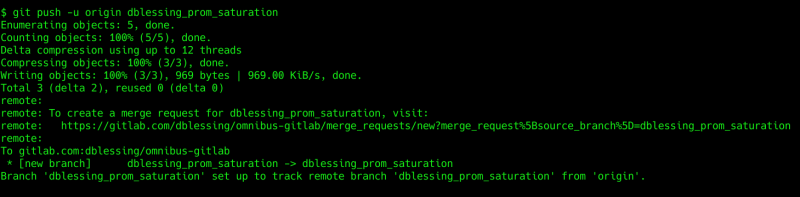
6. Pushing the Feature Branch
Once the rebase is complete, Drew pushes his dblessing_prom_saturation branch to his remote repository (origin).
git push -u origin dblessing_prom_saturation
7. Creating a Merge Request (MR)
After pushing, Drew can create a Merge Request (MR) on GitLab to propose his changes to the main repository.
Merge Request URL: https://gitlab.com/dblessing/omnibus-gitlab/merge_requests/new?merge_request%5Bsource_branch%5D=dblessing_prom_saturation
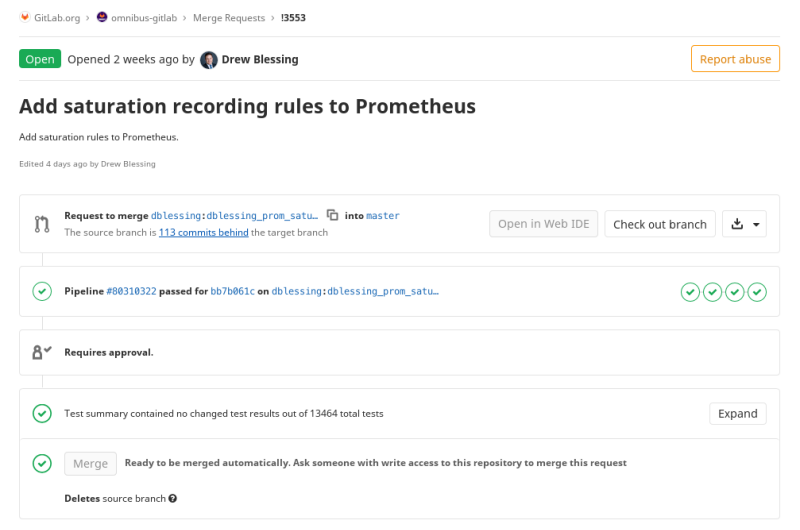
The maintainer of the upstream repository will review the MR, conduct code review, and merge the feature branch into upstream/master.

8. Syncing with upstream/master After the Merge
Once the MR is successfully merged, Drew can safely update his local repository to reflect the new changes from the upstream master branch.
git checkout master
git fetch upstream
git merge upstream/master
Finally, Drew pushes the updated master branch back to his fork on GitLab.
git push -u origin master
Key Do’s and Don’ts in Feature Branch Workflow
To maintain a smooth and conflict-free workflow with Git, here are some important guidelines:
Do’s:
- Create a new branch for every new feature or bug fix.
- Rebase your feature branch onto the latest master regularly to stay up-to-date.
- Use Merge Requests (GitLab) or Pull Requests (GitHub) to merge your feature branch into the master branch.
Don’ts:
- Do not push directly to the master branch.
- Do not merge directly into the master branch without a code review.
- Do not push to the remote master branch unless syncing it with the upstream master.
Conclusion
Switching to a feature branch workflow can help prevent frequent Git merge conflicts and streamline collaboration among multiple developers. By isolating development work in feature branches and regularly syncing with the main project’s master branch, developers can ensure they’re always working with the latest project state.
With this workflow, you get the best of both worlds: isolated development and a stable main branch. The process is simple but powerful, and tools like GitLab and GitHub make the workflow even smoother with features like Merge Requests and Pull Requests.
Reference
- https://gitlab.com/gitlab-org/omnibus-gitlab.git
- https://www.atlassian.com/git/tutorials/comparing-workflows/feature-branch-workflow
- https://education.launchcode.org/liftoff/modules/git/git-workflow.html
- https://www.ntu.edu.sg/home/ehchua/programming/howto/Git_HowTo.html
- https://www.liatrio.com/blog/branching-strategy-enables-rapid-delivery
- https://stackoverflow.com/questions/3611256/forking-vs-branching-in-github